If you’re looking to add a little extra security to your home, or just want to add a decorative touch to your property, hanging a metal gate on a brick wall is a great option. But if you’ve never done it before, it can seem like a daunting task. Here’s a step-by-step guide to help you get the job done quickly and easily.
First, gather the supplies you’ll need: a drill, concrete screws, an impact driver (if you’re using screws that are longer than 3 inches), and of course, the gate itself. Once you have everything gathered, mark out where you want the gate to go. It’s important to make sure that the hinges are properly aligned before drilling any holes.
Next, drill pilot holes into the bricks at the top and bottom of where the gate will be hung. These holes should be slightly smaller than the diameter of the concrete screws that you’re using. Once all of the pilot holes are drilled, insert the concrete screws and tighten them down with an impact driver or ratchet wrench.
Finally, hang your metal gate on the newly installed hardware and enjoy your handiwork!
- Hang the metal gate on the brick wall using L-brackets
- Secure the L-brackets to the wall with screws
- Hang the metal gate on the brackets and secure it in place with bolts or screws
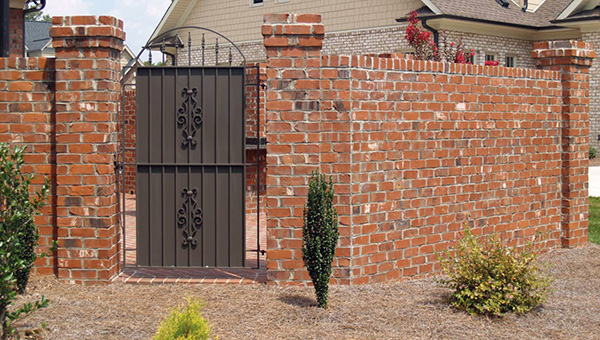
Hanging A Gate On A Stone Or Brick Wall Tutorial
How to Attach a Gate to a Block Wall
If you’re looking to add a gate to your block wall, there are a few things you’ll need to do to ensure a secure and stable connection. First, you’ll need to gather some supplies including: concrete screws, washers, a drill, a hammer, and some wire mesh. Once you have all of your materials, follow these steps:
1. Mark the location of where you want your gate on the wall. Then use the drill to create pilot holes for the concrete screws.
2. Insert the concrete screws into the pilot holes and add a washer onto each screw.
3. Use the drill again to tighten the screws until they’re snug against the washer – be careful not to overtighten as this could strip the screw or damage the wall.
4. Next, take your wire mesh and cut it to size so that it will fit over the opening of your gate (you may need help with this step).
5. Attach the wire mesh to the frame of your gate using staples or small nails.
Make sure that there are no gaps in coverage as this could weaken the structure.
How to Install a Gate on Side of House
If you’re looking to add a bit of privacy and security to your home, installing a gate on the side of your house is a great option. Here’s a step-by-step guide on how to do it:
1. Decide where you want the gate to be located.
You’ll need to take into account things like foot traffic, vehicle access, and aesthetics when making your decision.
2. Measure the area where the gate will be installed. This will ensure that you get a gate that fits properly.
3. Choose the type of gate you want. There are many different options available, so take some time to browse and find one that meets your needs and taste.
4. Purchase the materials needed for installation.
This includes things like posts, brackets, hinges, and screws/nails.
5 . If necessary, dig holes for the posts using a post hole digger .
The depth of the holes will depend on the height of your posts . Fill each hole with concrete mix before inserting the posts . Allow the concrete to set according manufacturer’s instructions .
which is typically 24 hours .
6 Attach brackets near the top and bottom of each post using screws or nails . These will be used to secure the crossbeam later on .
How to Install Metal Gate Hinges
If you’re looking to add a touch of class and sophistication to your home, then installing metal gate hinges is a great way to do it. Not only do they look great, but they’re also built to last. Here’s a step-by-step guide on how to install them:
1. Start by measuring the width of your gate and the distance between the posts. This will ensure that you get the right size hinges for your project.
2. Once you have your measurements, head to your local hardware store or order them online.
3. To install the hinges, first attach the top hinge to the post using screws or bolts. Then, line up the bottom hinge and screw or bolt it into place.
4. Finally, open and close your gate a few times to make sure that everything is working properly.
Fitting a Garden Gate to a Wall
When it comes to fitting a garden gate to a wall, there are a few things you need to take into account. First, you need to make sure that the wall is strong enough to support the weight of the gate. Second, you need to make sure that the hinges are properly aligned so that the gate opens and closes smoothly.
Third, you need to make sure that the latch is secure so that it doesn’t come loose and cause the gate to swing open unexpectedly.
If you’re not confident in your DIY skills, then it’s best to call in a professional who can help you with this project. Otherwise, follow these steps and you should be able to fit your garden gate without any problems.
1) Measure the width of your gateway and cut two pieces of wood accordingly. These will form the frame of your garden gate.
2) Cut out a third piece of wood which will be used as a crossbar.
This will reinforce the frame and help keep it sturdy.
3) Nail or screw the three pieces of wood together using heavy-duty screws or nails. Make sure everything is nice and tight so that there’s no risk of anything coming loose later on.
4) Fit your hinges onto the frame (two per side should suffice). Again, use heavy-duty screws or nails to secure them in place. Do a dry run before attaching them permanently so that you can make any necessary adjustments.
If possible, use adjustable hinges so that you can fine-tune their position later on if needed. If not using adjustable hinges, mark where they will go on both the frame AND wall so everything lines up perfectly when installed..
It might be worth getting someone else to help hold things in place while you’re doing this step since it can be tricky working by yourself!5) Once everything looks good, go ahead and attach your hinges permanently using either screws or nails (depending on what type of hinge you’re using).6) Now forthe fun part – installingthe actuallatch! There are lots of different types availableon themarketplace ,so havea look aroundand find oneyoulike . Justmake sureto getone thatsuits thickscreensor doorssinceyoudon’t wantanythingcominglooseandcausingan accidentlateron .7 ) Onceyou’vegotyourlatchpickedout ,it’stimeforinstallation .
Credit: letsfixit.co.uk
How Do You Attach a Metal Gate to a Brick Wall?
There are several ways to attach a metal gate to a brick wall. The most common and strongest method is to use expansion bolts. First, mark the position of the gate on the wall.
Then, using a drill with a masonry bit, create pilot holes at least 1/2″ deep in the brick for each expansion bolt. Next, insert the expansion bolts into the pilot holes and tighten with a wrench until they’re snug against the inside of the gate frame. Finally, hang thegate on the bolts and secure it with washers and nuts.
Another option is to use L-brackets. First, mark the position of the gate on the wall. Then, using a drill with a masonry bit, create pilot holes at least 1/4″ deep in the brick for each bracket.
Next, insert the brackets into the pilot holes and secure them with screws. Finally, hangthegate onthebracketsandsecureitwithscrews .
A third option is to use toggle bolts.
First, markthepositionofthegateonthewall .Then ,usingadrillspecialtoggledrillset ,createdeepholesfortoggleboltsholdfasts .Nextinsertthetoggleboltsintotheholesuntil they click intoplace .
Finallyhangthegatetonwallbyitsdoorknoborhandleandtightensturdilywithasocketwrench or other appropriate tool .
How Do You Attach an Iron Gate to Brick?
There are several ways to attach an iron gate to brick. The most common and recommended method is by using expansion bolts, which are also known as masonry anchors. These are available at any hardware store.
Another option is to use lead anchors and tap them into place with a hammer. However, this method is not as secure as using expansion bolts.
Can You Attach a Gate Directly to a Wall?
If you’re looking to add a gate to your home for security or privacy purposes, you may be wondering if you can attach the gate directly to your wall. The answer is yes, in most cases, you can attach a gate directly to a wall. However, there are a few things to keep in mind before doing so.
First, it’s important to make sure that the wall is strong enough to support the weight of the gate. If not, the gate could potentially damage the wall or even collapse. Second, consider what type of material your wall is made out of.
If it’s made out of brick or stone, attaching a gate directly to it may not be possible without damaging the material. In these cases, it’s best to consult with a professional before proceeding.
Finally, think about how often you’ll need to open and close the gate.
If it’s going to be used frequently, attaching it directly to the wall may not be the most practical solution as it could become difficult to open and close over time. In this case, opting for a freestanding gates might be a better option.
How Do You Attach a Gate Post to a Brick Wall?
There are a few different ways that you can attach a gate post to a brick wall. The first option is to use concrete screws. These screws will go into the mortar joints of the bricks and will provide a very strong hold.
Another option is to use expansion bolts. These bolts will also go into the mortar joints, but they will expand as they are tightened, providing an even stronger grip. Finally, you could use masonry anchors.
These anchors are driven into the bricks with a hammer and then have a screw or bolt inserted into them. Whichever method you choose, make sure that you follow the manufacturer’s instructions carefully in order to ensure a secure connection.
Conclusion
If you’re looking to add a bit of extra security or privacy to your home, hanging a metal gate on your brick wall is a great option. Here’s a step-by-step guide on how to do it:
1. Start by measuring the opening for your gate and then cut two pieces of angle iron that will serve as the top and bottom rails.
2. Next, drill pilot holes into the bricks using a masonry bit and then fasten the rails in place with expansion bolts.
3. Now it’s time to hang the actual gate. If you’re using a pre-fabricated gate, simply follow the instructions that come with it.
Otherwise, you’ll need to measure and cut your own panels before attaching them to the rails with hinges.
4. Finally, install a latch or bolt at the top and bottom of the gate so that it can be securely closed.